10 Must Have Items for Differentiation

Friday, July 28, 2017


DIFFERENTIATION: It is a word we hear all the time in the education world. Special education teachers live, breathe, and preach the importance of differentiation in their classroom. Additionally, general education teachers are constantly being challenged to differentiate the curriculum they are using to meet the needs of ALL of their students. Teachers are left wondering, how do we actually differentiate worksheets and classroom curriculum? What materials are helpful in the differentiation process? I will be sharing some of the differentiation techniques that I use in my moderate to severe classroom over the next couple of weeks. Today, I am sharing some of my favorite items that you can purchase from, yes you guessed it, Amazon! These items will make the differentiation process go smoother and will make it more fun for you and your students! 

1. Crayola Markers:

I use these markers for differentiation and color coding in my classroom DAILY. The tropical set is my favorite because they are so much fun! On a completely separate note, my students will work for the privilege of using these markers at my center. 


2. Paint Dotters:

These are awesome for non-writers. They assist with hand-eye-coordination, attention skills, and even fine motor skills. Many of my students that do not tolerate holding a pencil or crayon, will tolerate holding and using these. 


3. Number and Letter Stamps:
(*can be purchased separately, but it is cheeper to buy together) 

Again, I use these for my non-writers. Instead of using a pencil to answer their math problems, they use these stamps. These are also awesome for math worksheets, spelling worksheets and tests, and for practicing names. 


4. Stamp pads:

You cannot use stamps without a stamp pad. These are my favorite. They are washable and do not dry out! There are lots of different colors that you can purchase. 


5. Finger crayons:

These are good for students with poor fine motor skills. Instead of grasping the crayon they place them on their fingers to color. 


6. Highlighters:

These are a MUST have in my classroom! I like this type of highlighter because it has a chisel tip. I place these at all of the centers in my classroom. These are used for students that can trace letters and numbers, but cannot write independently yet. These are also used for additional visual prompting for cutting. 


7. Adaptive scissors:

These are my favorite adaptive scissors. The spring can be slid into the scissors, making them open easily during use, or the spring can be slid out of the scissors, making them a normal pair of scissors. I make sure I have a set of these at every table in my classroom. 


8. Laminator

Some students benefit from laminated and velcroed pages and activities. This is my favorite laminator. I have two-one for home and one for school. 


9. Lamination sheets

These are my favorite lamination sheets. 


10. Custom Name Stamp

These are amazing for non-writers. My students love being able to stamp their name on their paper. I would suggest asking for $10 from each parent at the beginning of the school year to buy these stamps. Explain that the stamp will go with them to the next class/will be sent home at the end of his/her time with you. I recommend this stamp because it is self-inking, making it super convenient to use. 


0

8 Steps to Creating an Interactive PDF

Saturday, April 29, 2017
As many of you know, I have recently become a huge fan of creating and using interactive PDFs for my students to use in my classroom. I love that I can create a personalized activity for my students that requires no additional prep. Additionally, my students really enjoy these activities because they can be used on the computer and iPad. I have had so many people ask me how I create these interactive PDFs. Today, I am finally sharing my simple tutorial for creating interactive PDFs. Creating interactive PDFs is very simple, but it is very time consuming! If you have additional questions, you can email me at delightfullydedicatedspecialed@gmail.com.


1. Create your activity using powerpoint


2. Save the powerpoint as a PDF


3. Open the file in Adobe Acrobat  


4. Go to "Tools" and Select "Edit PDF"


5. Select "Links" and then Select "Add/Edit Document Links" from the drop down options


6.  Draw a box with your cursor around the item/area of the page that you want to be linked. A pop up window will open. Make sure that "Go to page view" is selected under "Link Action."  Select "Next."


7. A pop up window will open giving instructions. Go to the page that you would like the item/area of the page that you selected to be linked to. Once you are on the page that you want it to be linked to, select "Set link."


8. Continue steps 6-7 for the remaining links that you would like to add


TIP:  Place your cursor towards the bottom of the page. Select multi page view so that you can see 3+ pages on the side. This makes it easier to navigate from one page to the next. 


Check out my interactive PDFs here


0

6 Steps to Mix Up Your Calendar Routine

Tuesday, March 28, 2017
Towards the middle of this school year, I realized that I needed to mix up my Calendar routine. Sadly, my calendar routine had become stagnant and boring. I was just going through the motions. Once I realized that, I began my journey to find activities and strategies that would be more effective, engaging, and hands-on for my students. With the help of some exciting products from fellow special education teachers and the creation of some new products, I was able to come up with a routine that is effective and fun. My students, staff, and I no longer dread my calendar time. 

What does my calendar routine consist of?

-Check-In
-Calendar
-Menu
-Weather Report
-Flag Salute
-Check Out


Here are 6 simple steps to creating a more engaging and fun calendar time: 

1. Include an Engaging Check-In PowerPoint or Interactive PDF

My students start each day by determining "who is here today," greeting each other, writing or typing their name on the board, singing the "Goodmorning Song", and spinning in my chair (yes, I let them spin in my special desk chair). I used to have a powerpoint presentation with all of my students' names on it. I would modify it a bit for each student depending on their skill level. Some students would write their name, others would trace their name. Through time, I came up with my Check-In Interactive PDF.  My students come to the board each morning, select their name, state if they are here today (yes or no), choose a way to greet their classmates, and choose to either type their name or write their name. When it comes to writing their name on the board, I have each of my students write their name in a way that is appropriate for them. Up until yesterday, I actually sold these CUSTOM Check-In Interactive PDFs in my store, but I have realized that they take a very long time to make and customize. Now I just have a Basic Check-In Interactive PDF in my store that you can purchase here. It is not customizable or personalized, but it is a fun way to get your students' involved in your morning attendance/check-in. 


2. Brainstorm Engaging Calendar Routines and Mix Yours Up Sometimes

This school year, I decided to go paperless with my calendar routine. I no longer have a large calendar, magnets, icons, or random pieces on a bulletin board in my classroom that takes up a ton of wall space. I simply use my laptop and projector during our calendar time. Up until about a month ago, I used the Unique Learning System interactive calendar and weather activities, but then Autism Adventures created her AMAZING Interactive PDF Calendar. The calendar has been a game changer in my classroom, especially because it utilizes Boardmaker symbols that correlate to my AAC devices and communication boards. I love that I can access my calendar at anytime during the day and that I do not have to worry about resetting my calendar pieces each month. Plus, now I have extra wall space for other fun activities and student work display! You can purchase Autism Adventures' Interactive Calendar here. 

3. Focus on Communication 

My main focus for my calendar time is COMMUNICATION. My calendar routine is repetitive and consistent for my students. With that said, it is a perfect time for my students to practice using their words and their communication devices. I prompt EVERY student in my class to communicate with me during our calendar time in whatever way is appropriate for them. EVERY student says what day it is, EVERY student says what month it is, EVERY student says what the date is. We spend time on this because it is important for me to teach my students how to use their voices and to learn how to use AAC devices for functional uses. We use our voice, a GoTalk, and an iPad with Dynavox Compass installed on it during this time. Like I said, the AAC visuals correlate perfectly with the interactive calendar that we use. 

4. Incorporate Visual Menus 

I create a visual lunch menu each month using pictures so that my students can be more independent while reading the menu each day. My students love being able to read the menu, point to their favorite foods, and see what is for lunch the next day. If this is something that you would like to do in your classroom, I have created Visual Calendar Templates. Simply open the PDF or powerpoint document and insert the photos into the appropriate calendar boxes. Type the name of the food item into the calendar box. You can also use the Visual Calendar Templates for marking holidays, special school events, and birthdays. You can purchase my Visual Calendar Templates (March 2017-July 2018) here


5. Highlight One Student or a Group of Students Daily during the Video Weather Report

After we have reviewed our calendar, menu, and weather, I select one student to give the weather report. This student comes to the front of the classroom, stands in front of the board, and gives the weather report using either his/her voice or an appropriate AAC device. I videotape the student giving the weather report and sometimes throw in other questions (what are we having for lunch? what day is it? etc.). I use one of the classroom iPads to record the student. After their report is finished, they head back to their desk, I connect the iPad to the Apple TV, and I play their report for the entire class to watch. My students LOVE being the weatherman or weather-woman for the day! You can read more about the technology that I use in my classroom here. NOTE: if you are planning on doing this in your classroom, make sure to get parent permission to videotape your students. I use Hailey Deloya's permission slips and modify them as needed. You can download them for free here

6. Include an Engaging Check-Out Routine 

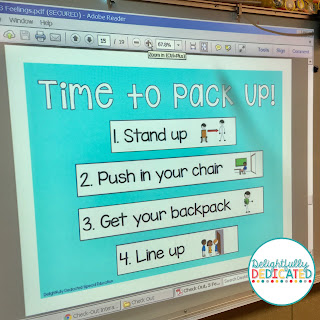
My students end each day by answering two questions: 1) how did you feel today? and 2) what was your favorite part of the day?, spinning in my desk chair, and receiving their token economy reward for the day. My students then are prompted through four steps of lining up: 1) stand up, 2) push in your chair, 3) get your backpack, and 4) line up! I have created an interactive PDF to help with this. The last 15 minutes of our day used to be the most difficult part of the day, but that is no longer the case! You can purchase my Check-Out Interactive PDF here. 


0

March Task Box Activities for Special Education Classrooms

Thursday, March 2, 2017

Can you believe that we are already three days into March? It seems like I was just blogging about my February task boxes. As many of you know, in hopes of keeping my students engaged and learning new skills, I center my task boxes around monthly themes. We had so much fun with our February task boxes, which you can look at here, but now it's time to say goodbye and welcome in March. With only six students in my classroom currently, I have a ten task box system in my classroom. You can check out my task box system here. I typically use the following formula when setting up my task box rotation each month: three math (various levels), three ELA (various levels), and four fine motor. I usually have a few extra prepared so that I can rotate them in as needed. I then assign each student one math box at his/her level, one ELA box at his/her level, and 1 fine motor task at his/her level. I have learned that I can find many appropriate FREE tasks just by doing a simple Pinterest and Teachers Pay Teachers search, but I always create a few myself as well. This month, I am sharing some of my favorites that I found while searching. Simply click on the title of the task box activity to be taken to the website/store where you can download and view an amazing product for FREE!


1. St. Patrick's Day Beginning Sound Match by Playdough to Plato 

2. Shamrock CVCe Puzzles by Playdough to Plato

3. Easter Egg CVCe Puzzles by The Kindergarten Connection

4. St. Patrick's Day Vocabulary Clothespin Task by Shining STARS Special Education


1. St. Patricks Day Math Sort (Numbers 1-10) from Mrs Ps Specialities 

2. Rainbow Sorting Coins Activity from Spinner's End Primary School


4. Eggs Visual Addition Matching  from Heidi Songs

5. St. Patrick's Day Ten Frames from Michelle Breaux

6. St. Patrick's Day Count and Clip Cards from Shining STARS Special Education


1. Easter Egg Color Match from Child Care Land Pre-K

2. Pom Pom Egg Crate Sort  from Burbuja de Lenguaje 

3. Easter Egg Match from Makes and Takes 


ALSO.... I do admit that I have fallen in love with a few PAID products! I LOVE LOVE LOVE Autism Adventures' Interactive Bulletin Board Set for task box activities. With each month, there are two themes, which means I can easily switch out my boxes every two weeks. Additionally, each month focuses on very similar skills, which means my students can work on the basic skills that they still need to master on while being INDEPENDENT.


I also LOVE Simple Special Ed's Vocabulary Binders. I have the students work on the vocabulary matching during our task box rotation to mix things up. The students first focus on matching picture to picture and then move on to matching picture to word. I even use her flashcards as a matching task as shown in the picture blow. 


0

Technology in the Moderate to Severe Special Education Setting

Thursday, February 23, 2017
As a special education teacher, I love using technology in my classroom. Why? Because it allows all of my students to be able to participate in our academic lessons and curriculum, while keeping students engaged and excited. With that said, I was taught that there is a time and a place to use technology. Some students can become obsessed with with technology, losing interest in more concrete and "real" day to day activities. It is important for you to find the technological balance in your classroom. My day is built around a variety of technological activities and tools; however, I also make sure to incorporate a variety of other fine motor and concrete tasks throughout the day. Four of my favorite technological tools in my classroom are: 1) my projector, 2) my document camera, 3) my Apple TV, and 4) my iPad(s). For the purpose of today's blog I will be focusing on the latter two: my Apple TV and my iPads.


Apple TV

Some teachers love their Smartboards, but I love my Apple TV. I primarily use it to project an app, website, picture, or video from my iPad to the big screen. My students and I have so much FUN engaging in academic tasks using the iPad while they are projected on the "big screen" using the Apple TV.  I have had a few students through the years with orthopedic impairments. Instead of those students missing on an activity during our group lesson (because it is too difficult for them to come up to the board or because it takes them too much to come to up to the board), they can participate with their peers at their seat. You can even attach an adaptive switch to the iPad to make it even more accessible for students with motor skills issues. On a side note: I recommend checking with your IT department or technology team before purchasing an Apple TV. I have heard that some teachers say that their network/internet at their district does not do well with the Apple TV. The Apple TV mirrors the activities that are on the iPad, allowing the entire class to see what one person is doing on the iPad, which brings me to my next favorite technological tool: the iPad.

iPads

My district is making the switch to 1:1 technology. While our general education students get Acers or Chromebooks, the moderate to severe students, get iPads. I currently have enough iPads in my classroom for each student to have one (yes, we are spoiled). With that said, we have little to no funds to purchase apps so I still use my own personal iPad so that I can purchase apps with my own iCloud account. I have purchased several apps that I LOVE. Some of them are not free, but, in my opinion, they are worth every penny that I paid for them! Today, I will be sharing 5 of my favorite apps. Be sure to enter the giveaway at the bottom for a chance to win an iTunes gift card to buy apps for your class!

Here are some of my favorite apps:

1. Splashtop


This is not technically a academic app, but it makes my life so much easier. Splashtop is an app that wirelessly connects your desktop computer or laptop to your iPad, making it possible for you to control your computer from your iPad. I have found this app to be extremely helpful for using Unique Learning System on the iPad. When I access Unique Learning System on the iPad using safari it is very slow and hard to navigate. This is even more true when I connect my iPad to the Apple TV. With Splashtop, I am able to easily access and navigate Unique Learning System using my iPad without lag. This has been wonderful for group lessons!
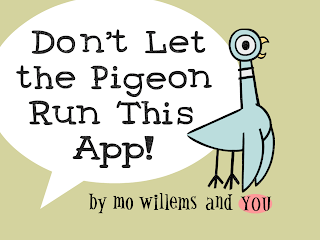
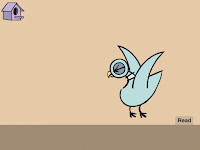
2. Don't Let the Pigeon Run This App! ($5.99) 


This app is so much FUN! If your students enjoy Mo Willems' other books, then they are sure to enjoy this app. The students have the option to 1) read the story, 2) create the story by selecting one visual answer out of three visual options, or 3) create the story by speaking into the recording mechanism. This app is a perfect way for students with limited communication skills to practice speaking. It is very motivating for shy speakers. My students love hearing the recording of themselves. The app is also wonderful for nonverbal students because it does offer the visual answer options, allowing ALL students to participate in the interactive story.


3. Pixel and Parker ($1.99) 


This is an interactive story combined with a counting gameboard. Students are lead through a story and asked to participate in a variety of activities in hopes of helping Parker find his cat, Pixel. In addition to this app, I also love Tally Tots and Alpa Tots, which are also created by Spinlight Studios.


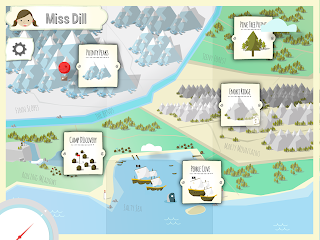
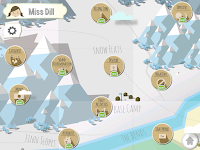
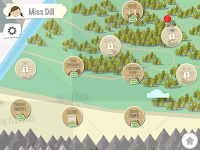
4. Autism Learning Games: Camp Discover Pro (FREE) 


I stumbled across this app when it was free for a short time. I quickly fell in love with it. This app makes Discrete Trial Training a breeze! Students are lead through a series of trials based on various topics. Each student has a different username. Yes, it is wonderful that the app tracks progress, but what I love most about this app is the preference assessment that the students take at the beginning of each activity. The students are praised for each correct answer based on the results of their preference assessment. Additionally, when the students have completed an activity, they are able to play a game.


5. Verbal Me ($5.99) 


There is a free version of this app, but I LOVE the paid version. This app offers you a variety of communication boards. I use it throughout the day for a variety of academic and non-academic tasks. The "yes" "no" communication board has become a favorite in our classroom.


13
Copyright Delightfully Dedicated: 2015. Powered by Blogger.